
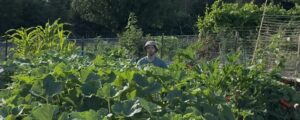
It’s high season here at the end of July and gardens are buzzing! This is the time of year at the community garden when while walking the paths you have to be spry and ninja-like to dodge all the large bushy green things looming over you at every turn.
July and August are probably the most fantastic months of the gardening season not just for harvesting, but the fun in seeing what’s happening in everyones garden plots and how gardeners are managing their situations. That brings us to today’s major theme, which is how I’ve been managing my situation.
If I had to theme last year’s season, it would be “first attempts”. First attempts building new raised beds, first attempt at plot 63P, first attempts at trellising, etc. This season begins what I’m calling the season of “structural experimentation”, particularly around trellising. I wrote a blog post last year that dove in-depth on my first attempt building support structures, specifically using home-sourced bamboo. I subsequently wrote another blog post showing many of those structures failing. Sigh. A quick refresh on some of those situations shown below:
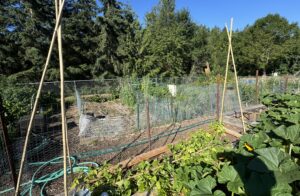
After an offseason ruminating on those collapses, I opted to focus this year on the trellising sector of gardening in hopes of mitigating some of those major and avoidable headaches in 2025 because it sucks seeing all your plants snapped on the ground and/or not being able to walk around vines wildly growing anywhere they want in your garden spaces.
Note: I’m upping my blogging game with the purchase of a small tripod, so now I can more easily post pictures of what I’m doing!
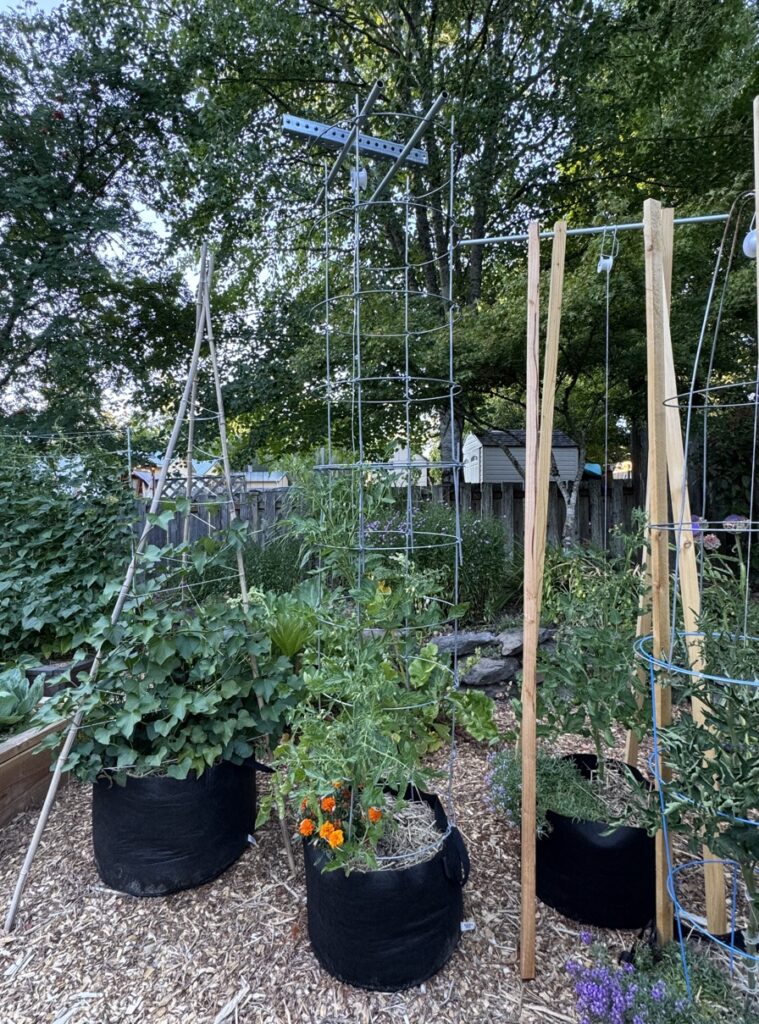
Setting the stage for my trellis projects was first a decision on what crops to grow and where to grow them. In the spirit of experimentation, this season a choice was made to try growing tomatoes in grow bags.
The idea of growing indeterminate tomatoes in a very portable (and moveable) situation was appealing, and growing them this way would allow a framework to noodle on different trellis designs to learn the level of effort needed to support said tomatoes and how successful (or unsuccessful) each design would be. So, I got to work.
Some designs involved using random stuff stored here at the house, like tying 2 tomato cages together or using metal components as top supports.
Other structures involved more building and materials, like making wooden-stilted towers.
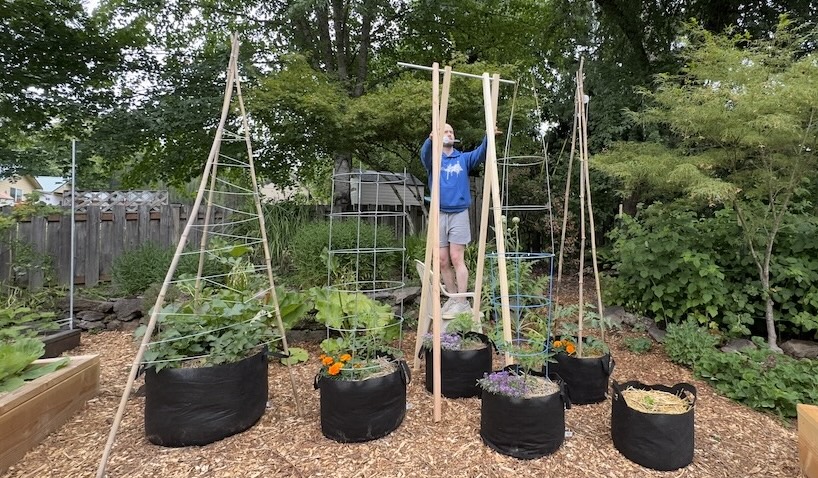
In total, there are 4 different structures with a 5th honorable mention.
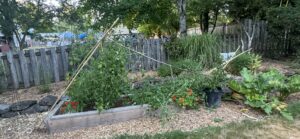
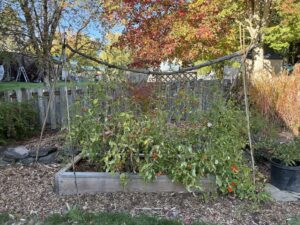
“The Homage”
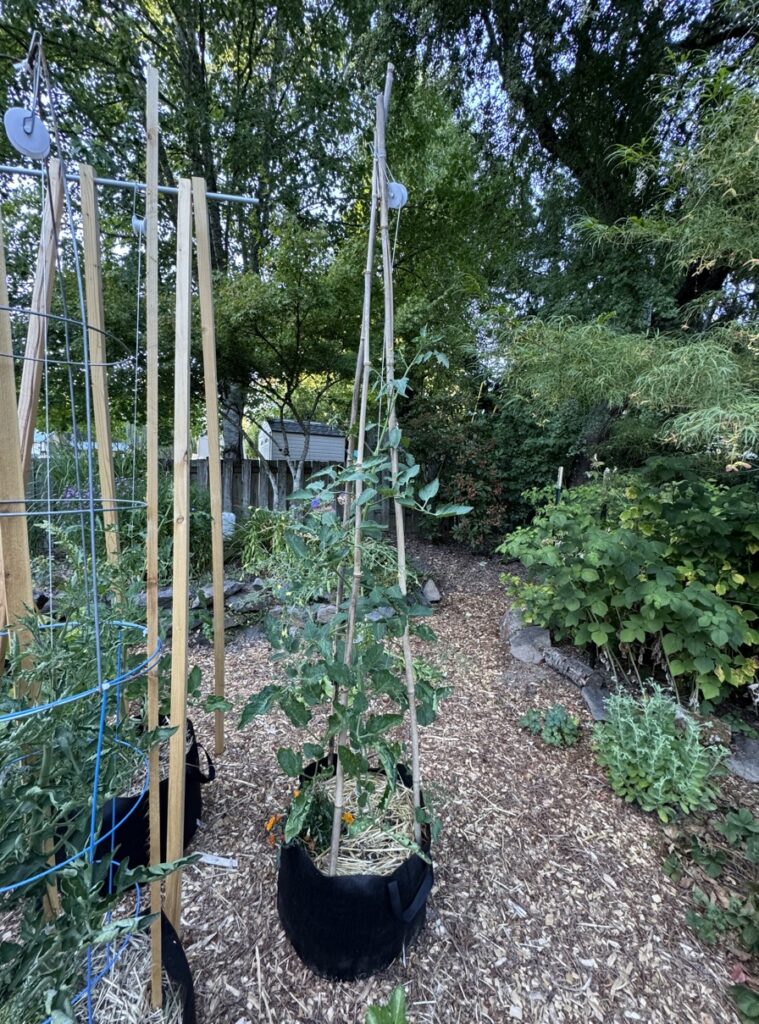
I couldn’t NOT attempt a simple tripod from homemade bamboo as one of the trellises, paying homage to last year. As mentioned before, last season more complicated bamboo structures failed, yet it was worth giving a simple bamboo tripod for a single plant a fair shot.
If this holds, it will open the door again to bamboo in these certain, smaller contexts for single plants like this indeterminate tomato. The trickiest part was guiding the tomato hook from the top, as you can see where I propped it on an angle.
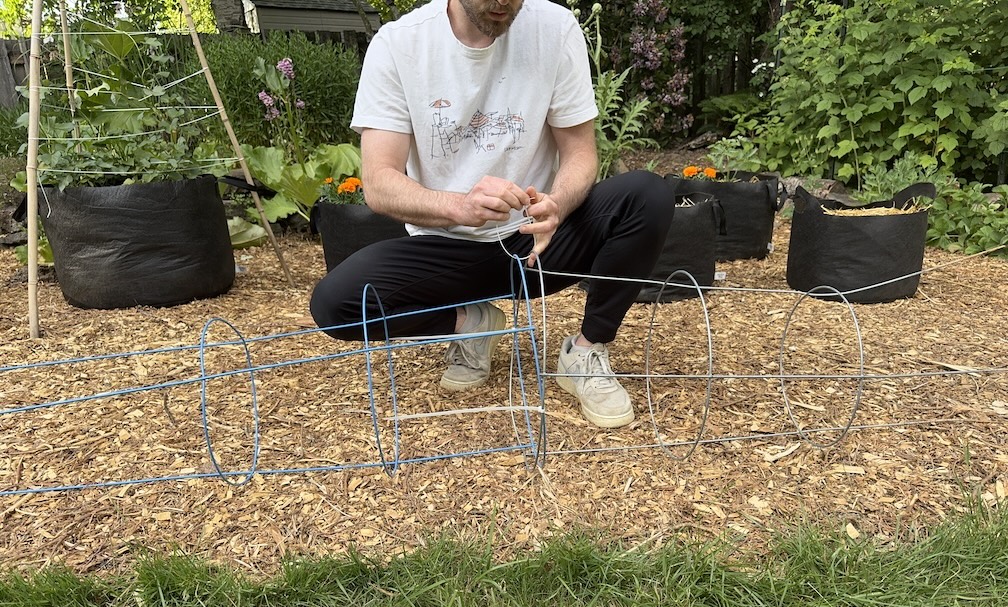
“The Tin Can”
I’ve eyed these cylindrical tomato cages at the nursery for some time, and felt it was time to give one a whirl to see whether it was all flash or actual substance. It collapses flat, so if it works then it’s highly storable. This trellis is arguably the tallest trellis depending on how it’s measured. It also fits inside the grow bag extremely well.
For the tomato roller hook I used an old piece of square tube and conduit pieces lying around. That made it easy to slide the hook into it since it already has holes in it.
“The Creative”
While not the sexiest trellis of the bunch, it’s one of the cheapest because, well, I thrifted these tomato cages out of our backyard tool storage area. Seeing as they weren’t doing anything useful in storage, I zip-tied them together and put them to use.
Since the shape is roughly conical, I ripped a few wood slats to give some extra support down at the base. If this works, I’ll have a great use for old and existing classic tomato cages for indeterminate tomatoes which is rather delightful.
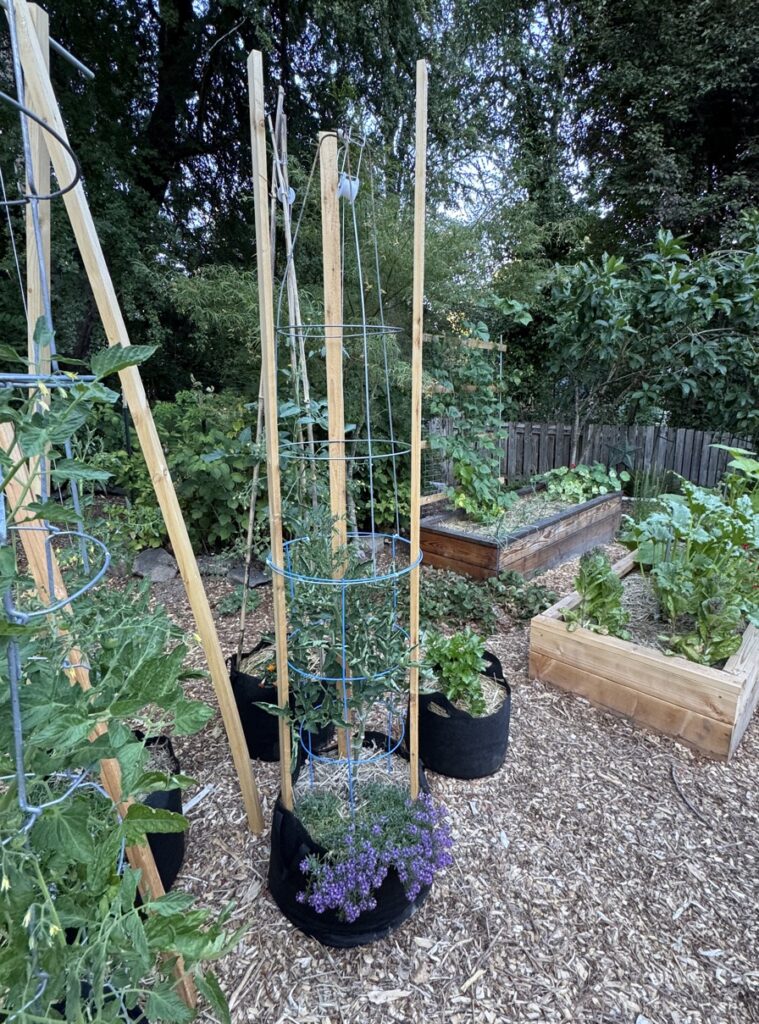
“The Monster”
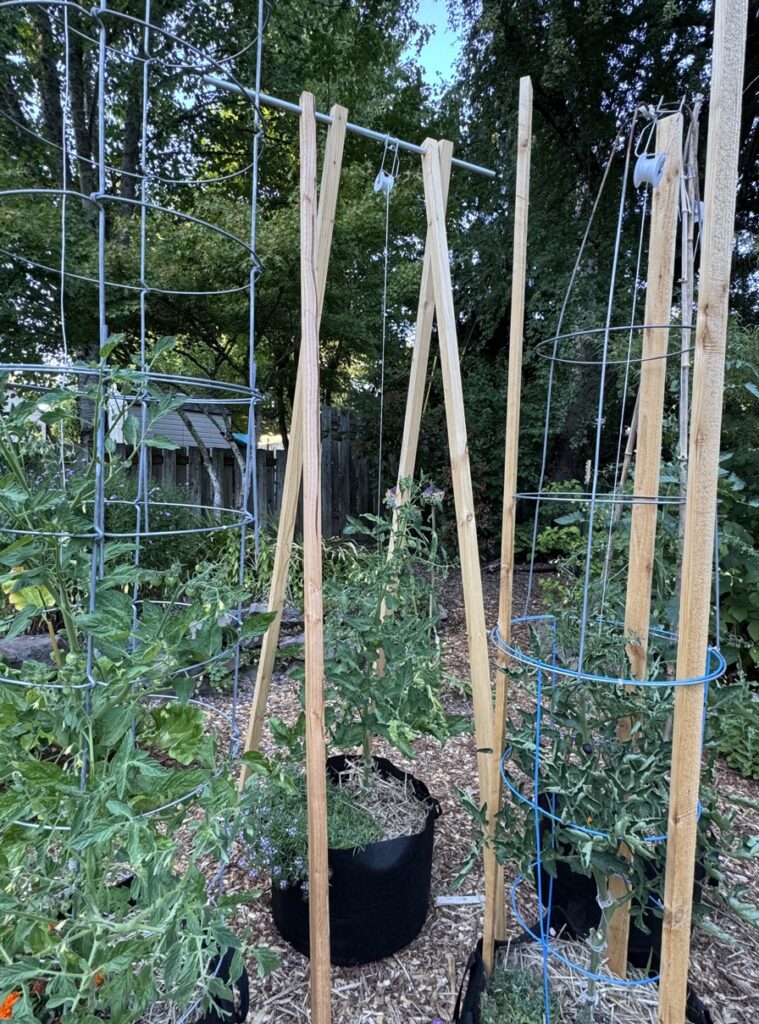
The most impressive, structurally, for the indeterminate tomato trellises goes to a wooded-stilted design I came up with, in which holes were bored into wood ends to slide a piece of conduit through and allows for swiveling the stilts to any desired height.
This design made it easy to attach the tomato roller hook and line to, centered above the tomato. This is also the only tomato trellis that exists beyond the bounds of the grow bag, so leveling it on the ground was important.
Honorable Mention
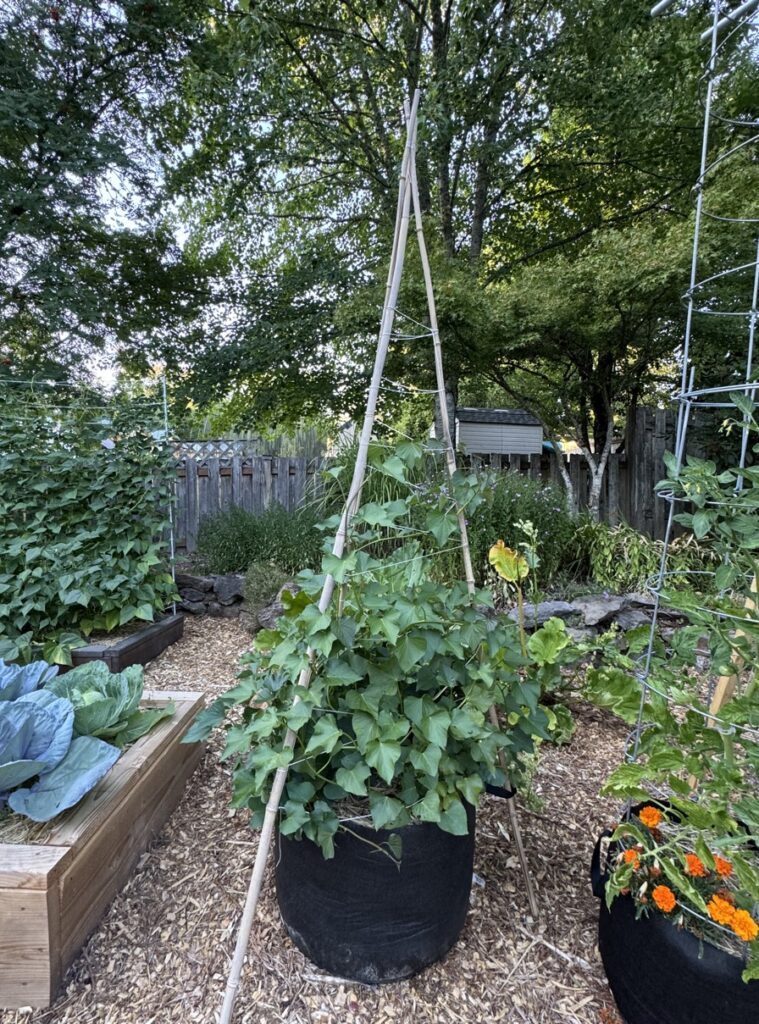
This is another bamboo tripod albeit a little larger and along the outside of a grow bag. The reason being is that this is not for a tomato (as you can see in the picture) but rather sweet potatoes.
Sweet potato vines don’t have tendrils as they just run along wherever, so I wrapped the tripod in string from the base of the bag up to the top and have been tucking vines up and around said string as it grows. This won’t hold much weight but is an easy structure if sweet potatoes actually end up producing.
That wraps up the grow bag section of the backyard. There are 2 other raised bed trellises I built to prop up crops, so we’ll briefly look at those next.
Fundamentally, the biggest shift in this year’s trellis designs was to try and take advantage of the raised beds themselves as part of the supports. This involved some ideation that ended up on an idea around metal conduit piping.
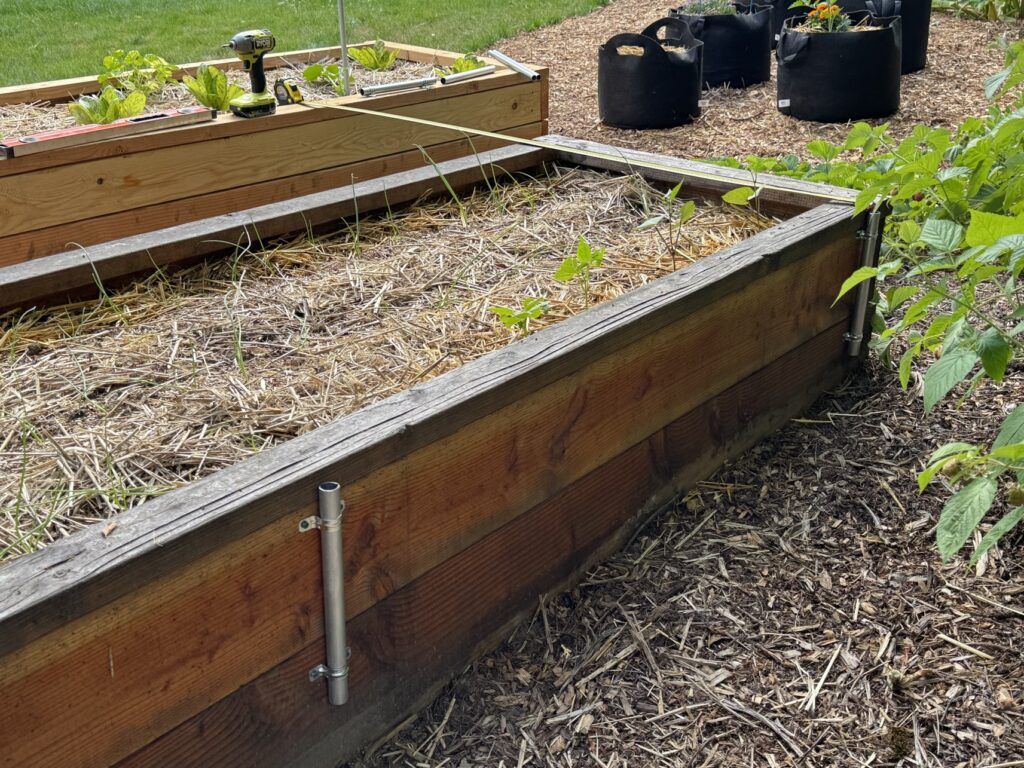
The idea was that on the raised beds that offered support, 3/4 inch conduit piping was cut and screwed into the sides of the bed. Then, I built varying trellis structures out of 1/2 conduit piping that could then slide down into each 3/4 inch conduit sleeve. These could be added during the growing season and removed when the season was over. That way the sleeves would always be there for future support needs, but be mostly hidden as an eyesore during the offseason.
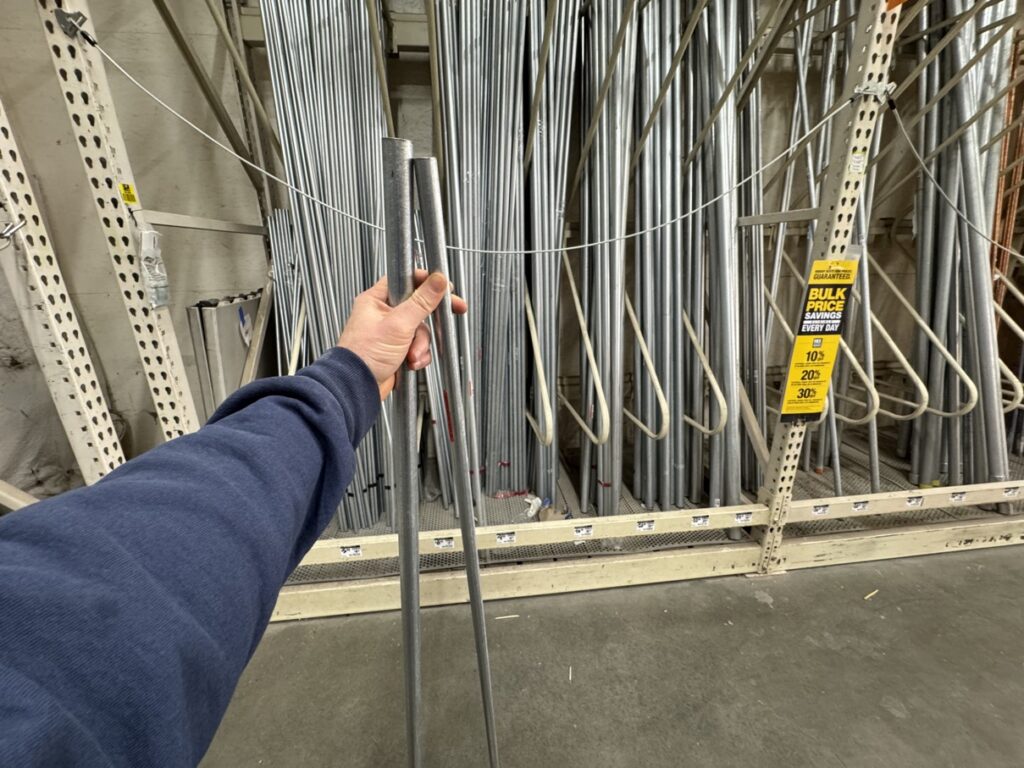
Off to Home Depot I went.
Then it was just a matter of building the trellises. For my pole beans, I decided to simply slide two 1/2 conduit poles into the bed’s sleeves and then “Florida Weave” string in-between them to support the vines.
I’ve already decided I’m not doing this next year. In a “hindsight is 20-20” moment, it’s obvious why the Florida Weave is popular for plants that aren’t climbers. Beans are climbers and hence want to attach themselves to support in a vertical nature, while the Florida Weave is meant to support plants in a horizontal nature, which made everything awkward. It kind of worked but next year when I grow dry beans they will each have something to climb instead.
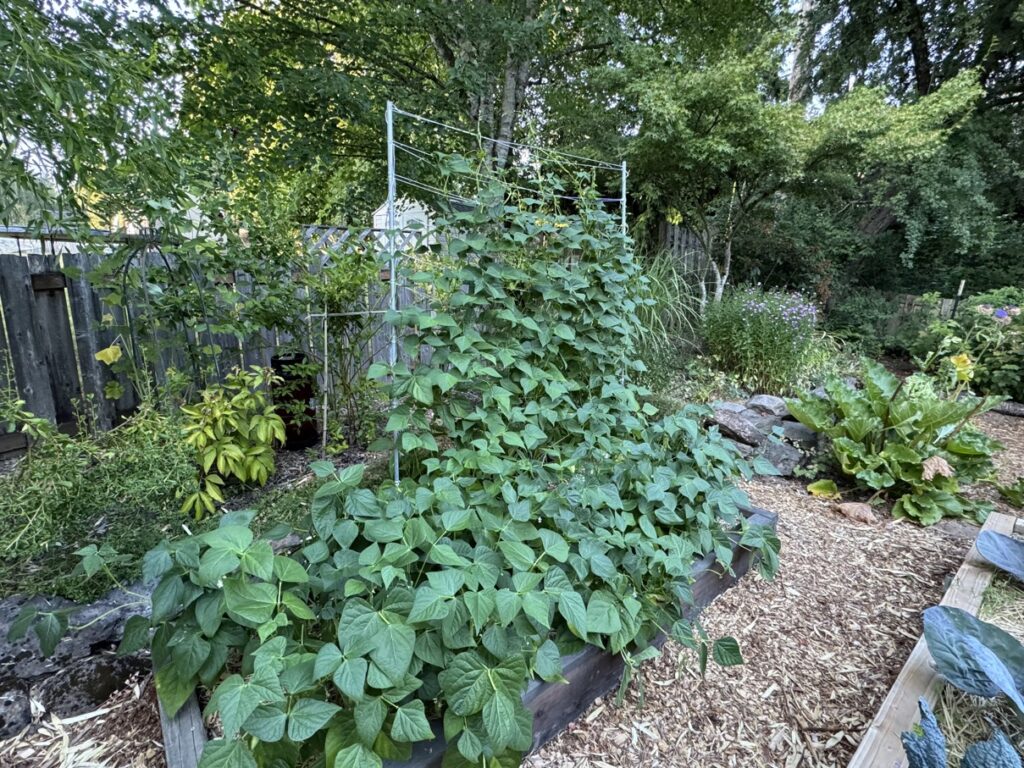
Luckily I didn’t expand this experiment for the snap beans. The snap beans would get a single grid wall to weave themselves on.
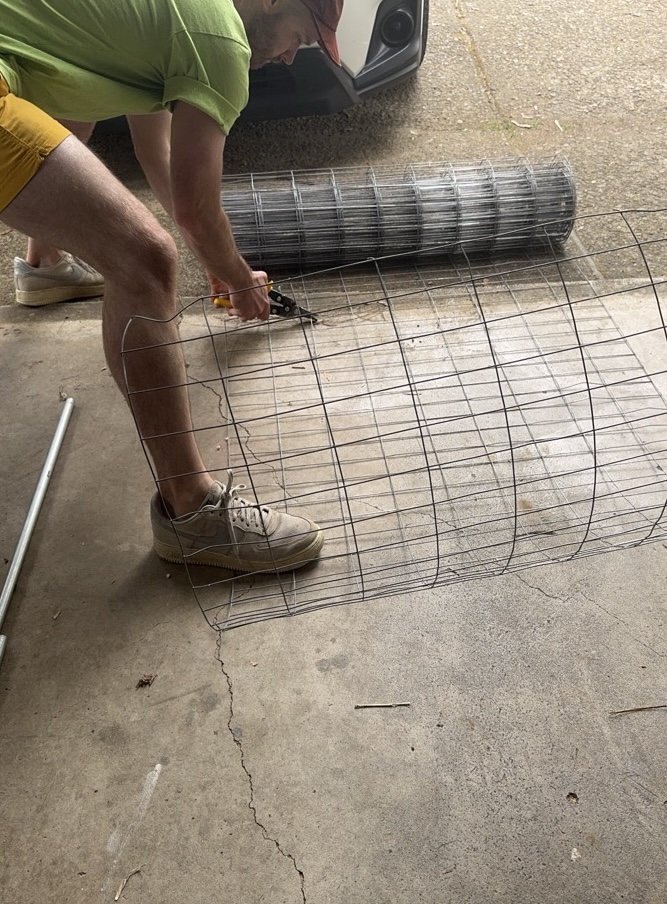
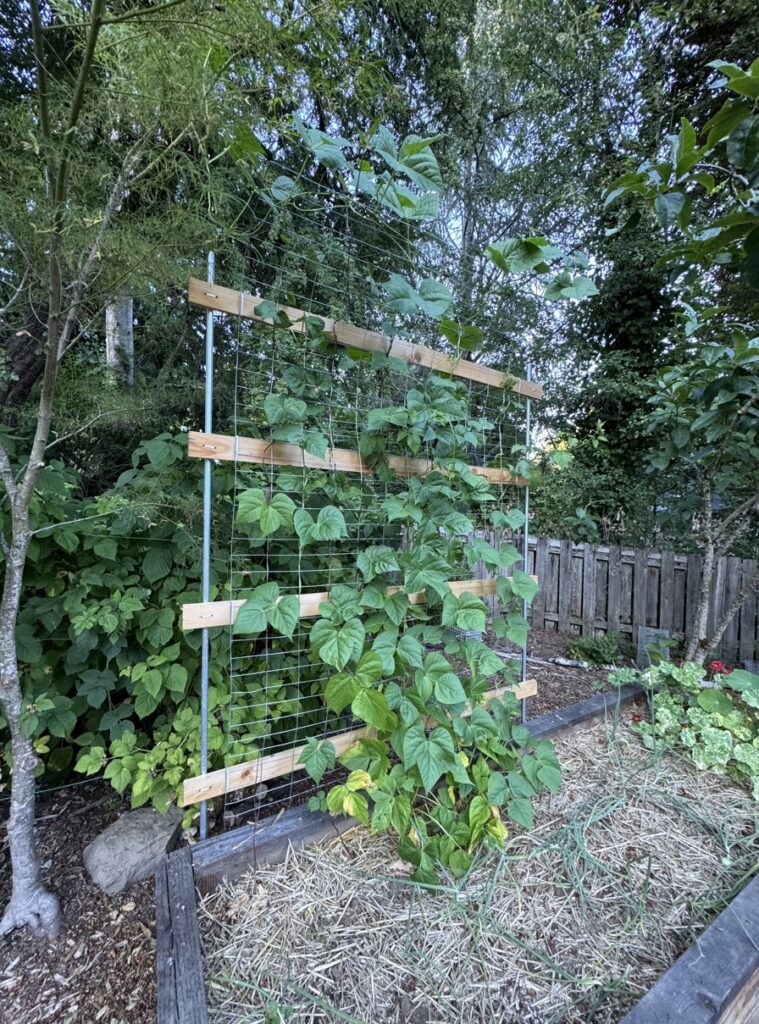
This involved ripping some slats, cutting 2×4 inch welded wire mesh, and zip-tying to polls that were then slid into the raised bed sleeves.
So far the beans have outgrown the structure height-wise, so next year I either need to train them in a zig-zag pattern or perhaps make it a bit taller/curved.
That covers activity at the house! Now we get to dive into the real big trellis project of the season. The behemoth of them all. The …
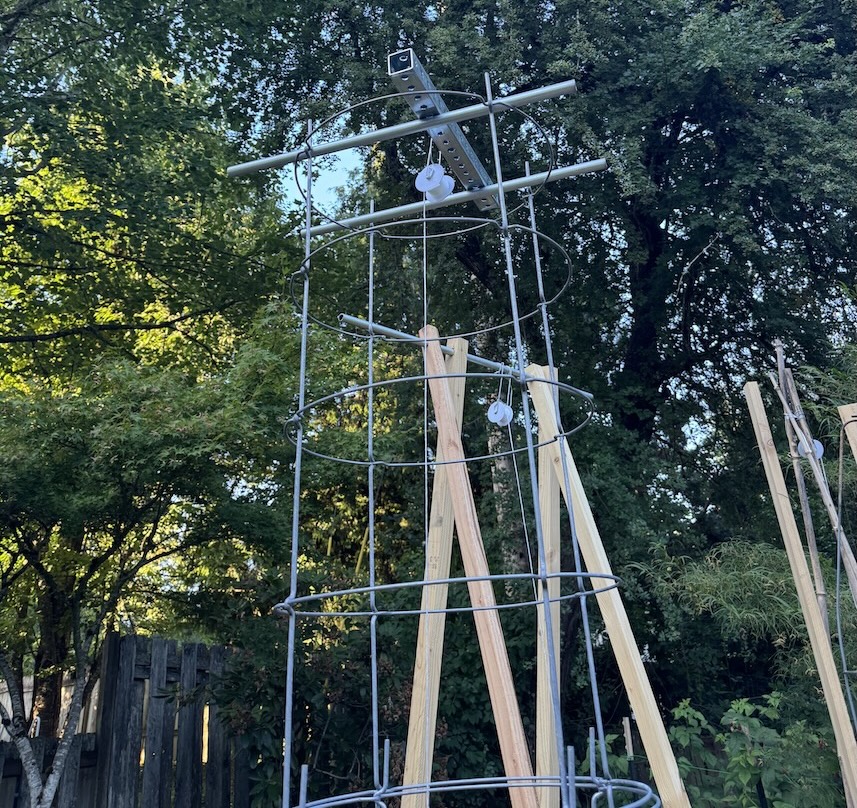
The MonArch
Let me preface with some garden planning that led to this sucker. From our successful harvest (and enjoyable consumption) of the winter squash experiment last season, I wanted to up the stakes even further and grow 4 varieties of winter squash; Butternut, Acorn, Spaghetti and Kabosha. Let me remind readers what just 3 (unsupported and not trellised) winter squash looked like at the plot last season:
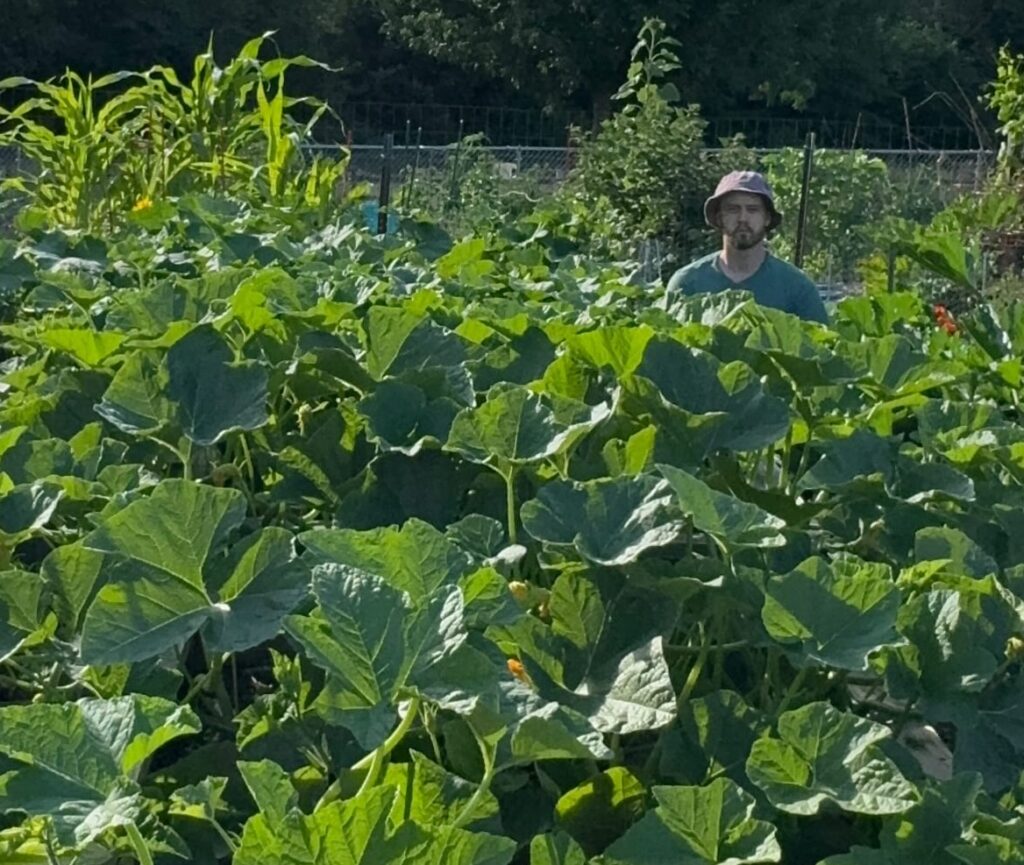
This chaos was a harsh lesson that winter squash … get big. If I wanted to not only grow them again but also increase to include a 4th variety, I needed to roll up my sleeves and meet them in the ring with a plan of my own.
The plan was to build upon the design for the snap beans earlier, building a trellis out of conduit piping, slide into sleeves attached to the raised bed, but then take it a step further and make an archway that allowed all four feet to slide into raised bed sleeves, spanning across 2 raised beds. So, I got to work again.
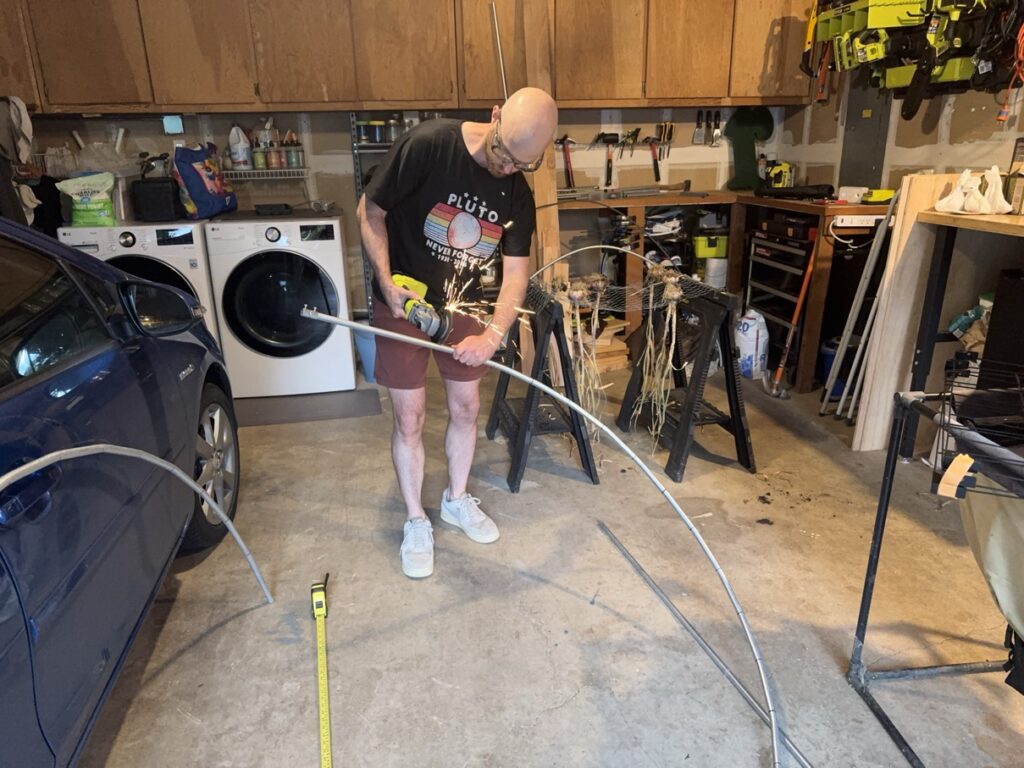
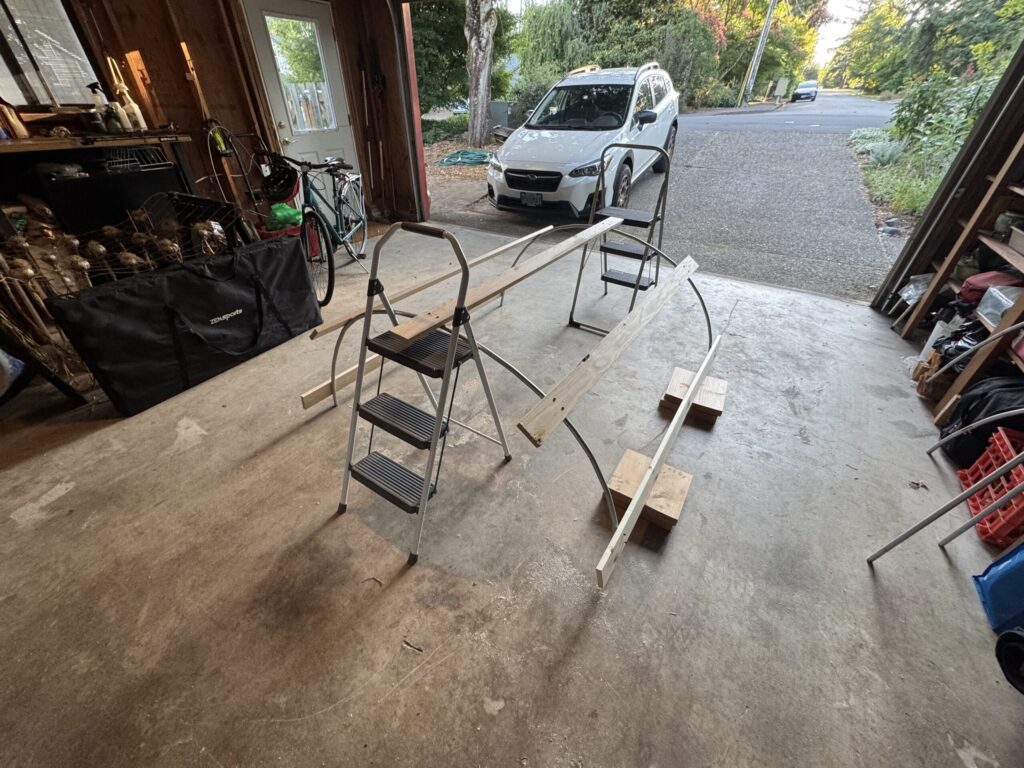
The trellis would be designed and built in 3 separate pieces, 2 walls and 1 arch, which would then be transported and assembled at the plot. Instead of zip ties holding everything together like the snap bean design, I would use wood-to-metal screws in order to attach the wood slats to the conduit pipes. Then I would staple the metal mesh wiring over each piece and assemble into place.
Step 1: The Walls
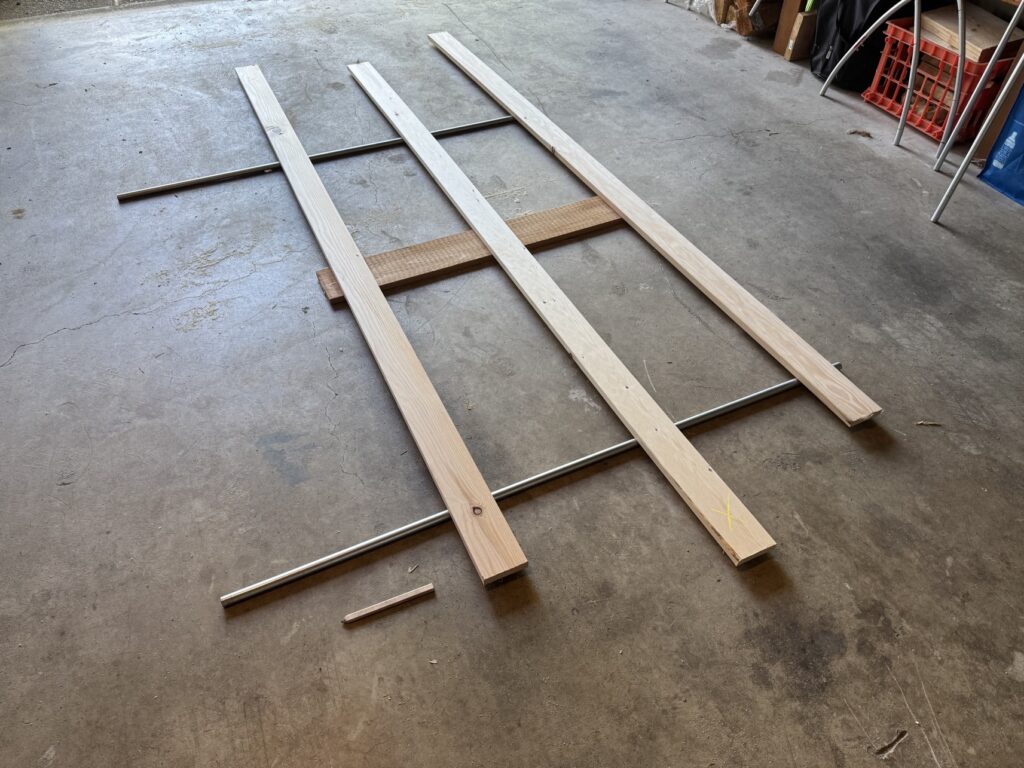
The walls were actually trickier than I thought they would be, because every hole had to line up based on measurements taken at the plot from where the sleeves on each raised bed were previously installed.
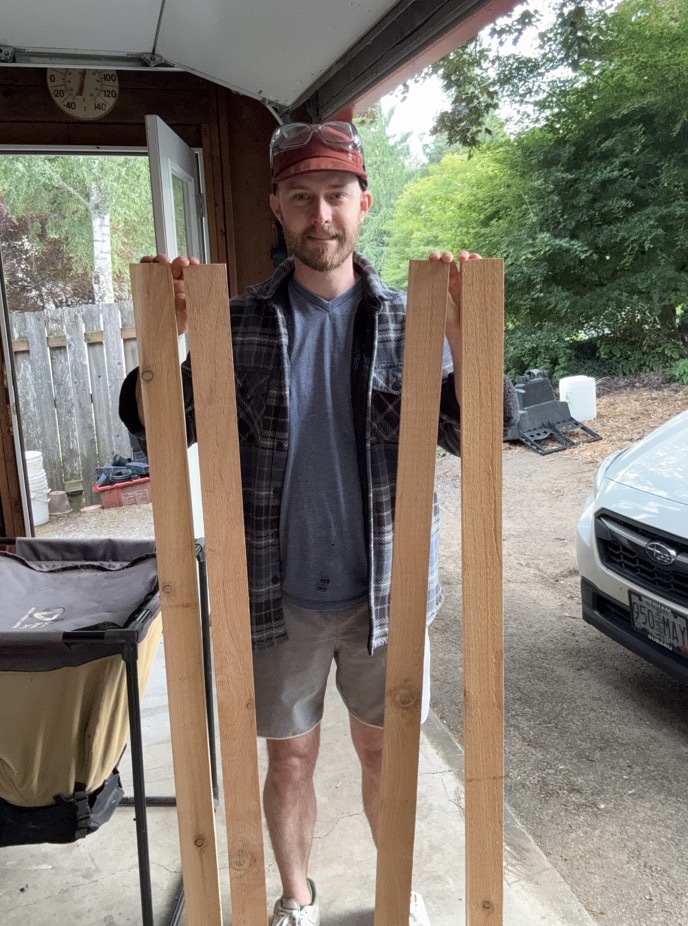
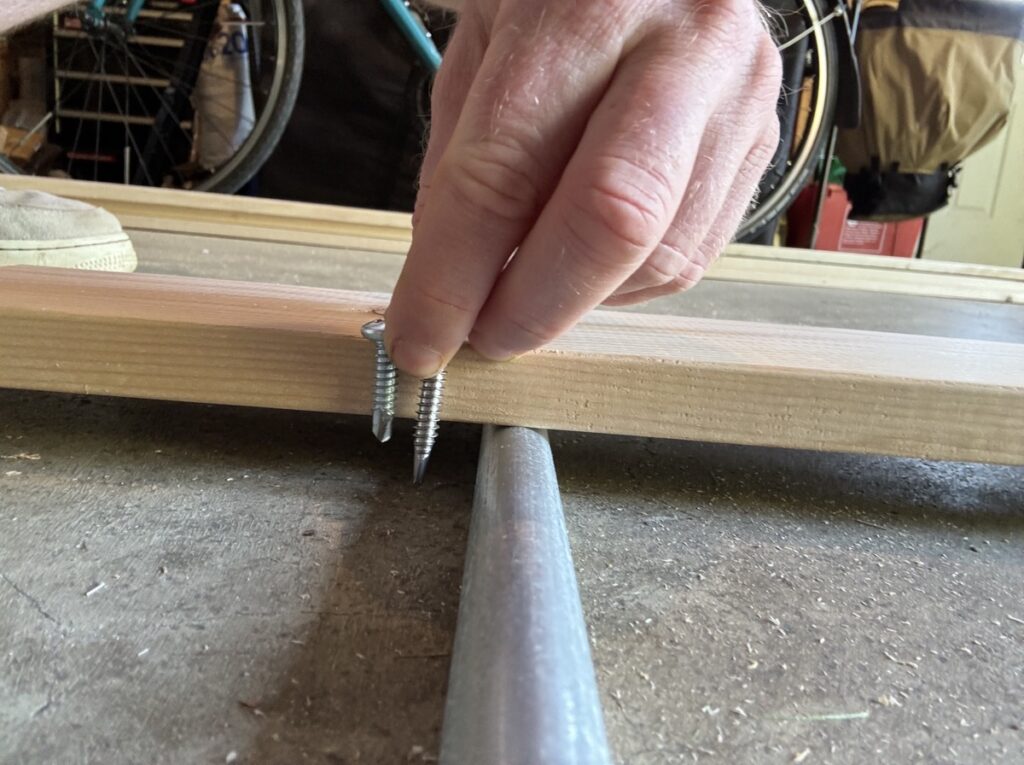
As you can see above, I used wood-to-metal screws, one of which I bought the wrong size and had to swap to something larger so that it would bite. One of many gotchas on this journey. Each wall would have 3 wooden slats stretching across the entire length.
The walls were then broken down, brought to the plot, built for real and slid into place at the plot. The wood is on the “outside” of the archway, which the mesh wire was stapled to for the plants to grow up.
Step 2: The Curve
Making a curve is hard. Like, really hard. It seemed like an easy task when I was happily building it in my mind’s eye, but in reality it was a real challenge.
How do I bend a length of conduit so that each end is parallel to each other? How do I make sure it only bends in one direction and not twist up like a helix? How do I bend it so that it’s the perfect width between my 2 walls? Oh, and then how do I replicate it exactly on the other side?
These questions brought back memories of when I was trying to understand how steering works when building our soapbox derby car.
I started off with, “how do I bend an arch?” and ended up with some crazy jigs and contraptions where I cut and screwed lots of wood together for leverage and proper curves for bending just to start. This thing would probably have been more useful in a modern art museum than as a conduit pipe bender.
It turned out to be a complete fail since I didn’t really know how “curvy” to make the jig and keeping it flat was a pain. I also got a bad grade in high school geometry so that obviously didn’t help.
Enter: my new best friend. I call him Bend Diesel the Pipe Bender.

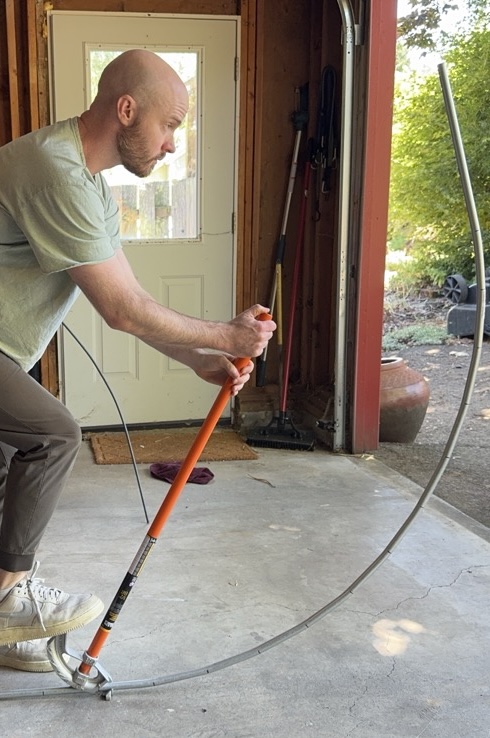
The pipe bender was a life changer. Thanks to a tip from my father who was building trellises of his own, along with a little help on the internet I figured out the length and strength of which to make bends in the conduit in order to make a proper half-hoop.
A little fritzing here and a little frutzing there and I had myself two fully built arch sides to proper width. They weren’t perfect but they would do the job.
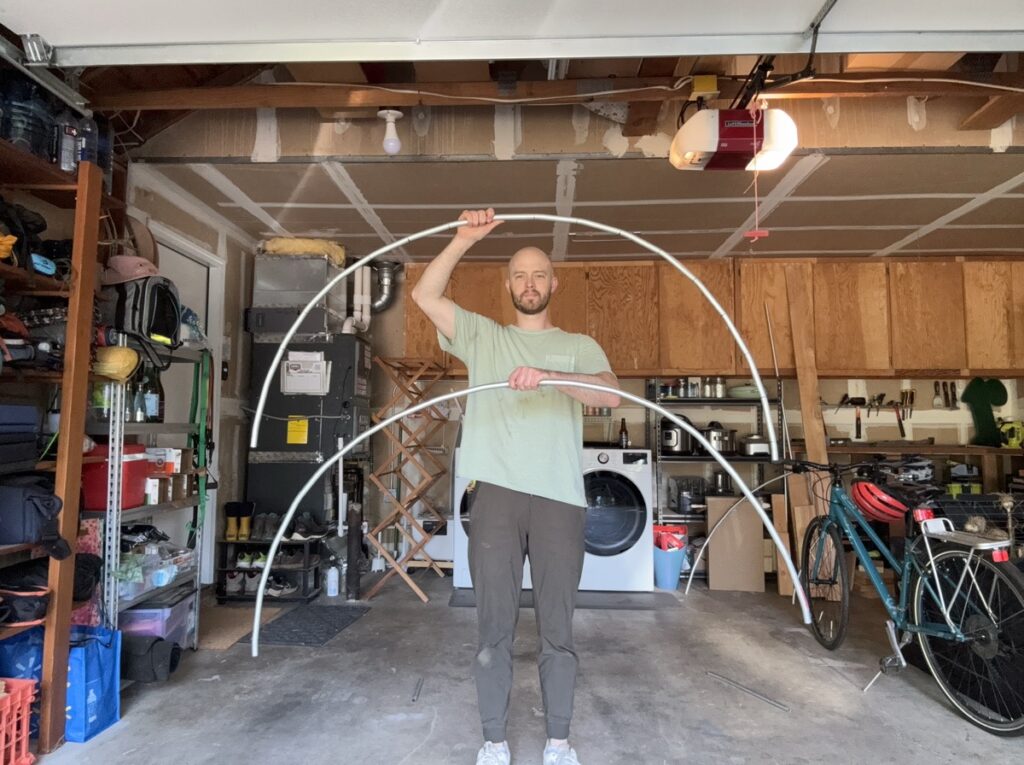
I was feeling so mighty and accomplished, and then I realized I still had to figure out how to put it all together.
Putting together an arched trellis is ALSO very difficult. It’s one thing building one at home for home use, but it’s another thing to build one for use somewhere else that you cannot transport to in one piece nor build on site. This involves basically mock building it at home, going off of faith for proper measurements, then disassembling it and then assembling it onsite in pieces.
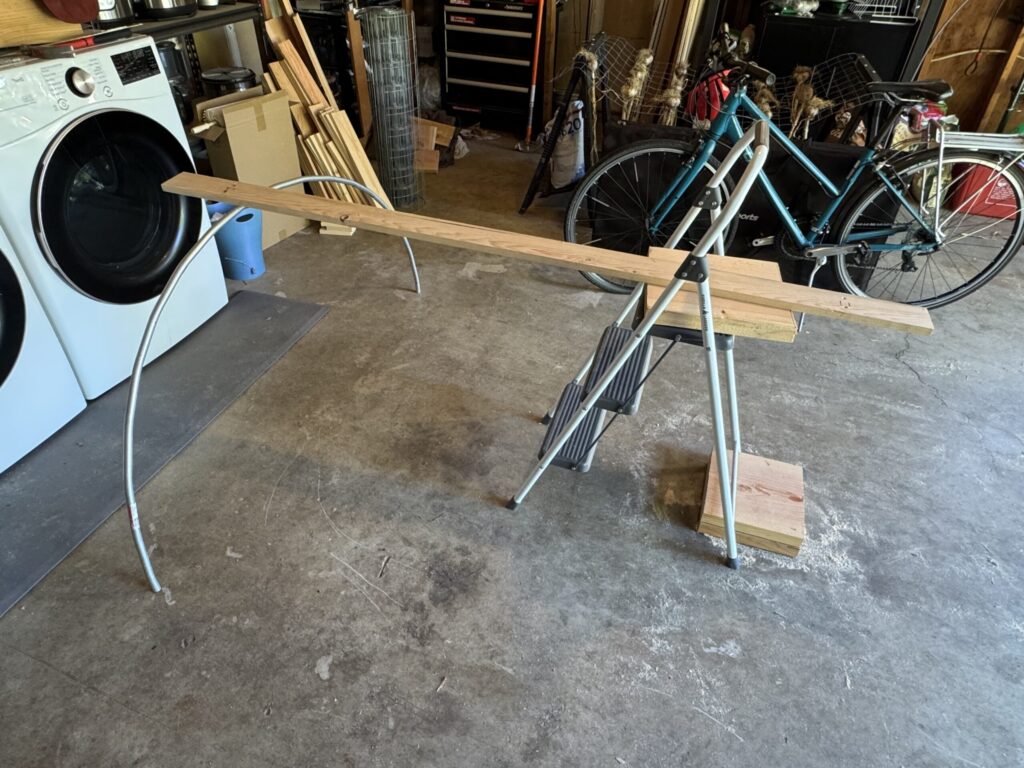

I had to get creative propping up the sides so that holes could be drilled in the proper places. This was imperative so that each arch foot would be properly spaced to properly couple with the top of the 2 walls which were properly spaced between the two raised beds. Phew. Lots of proper-ness.

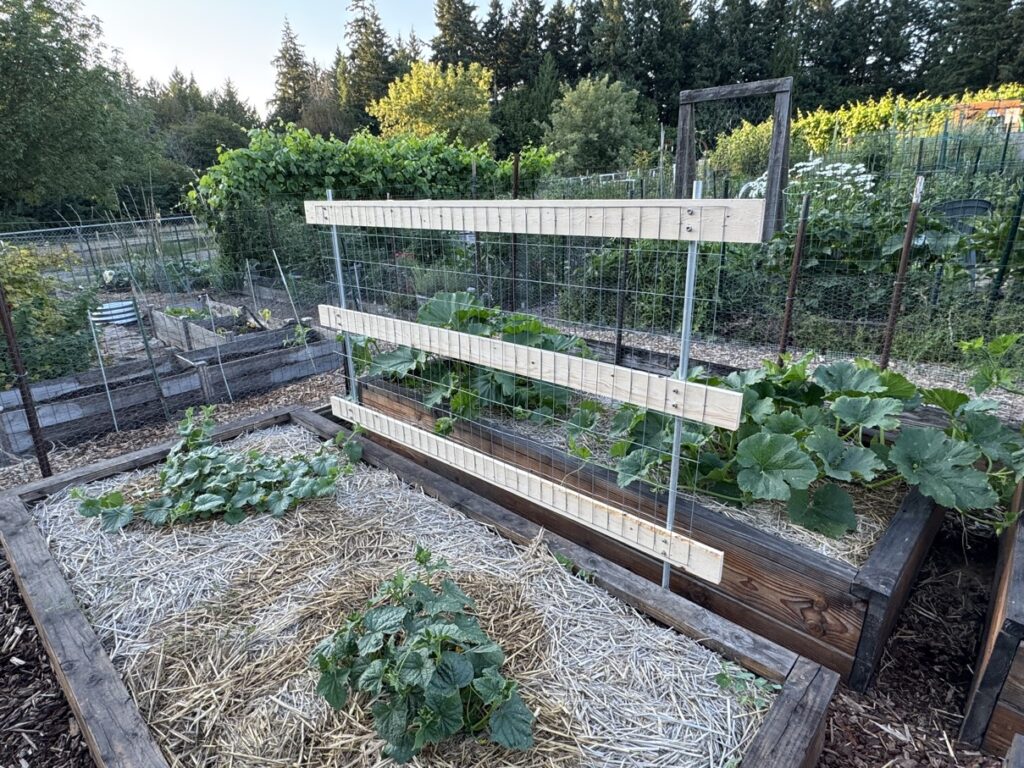
Not wanting to take any chances on structural integrity, the archway entailed 5 wood slats versus the 3 per each wall. I cut the mesh wiring after mock assembly to then transport and staple at the plot once assembled for real.
The great reveal:
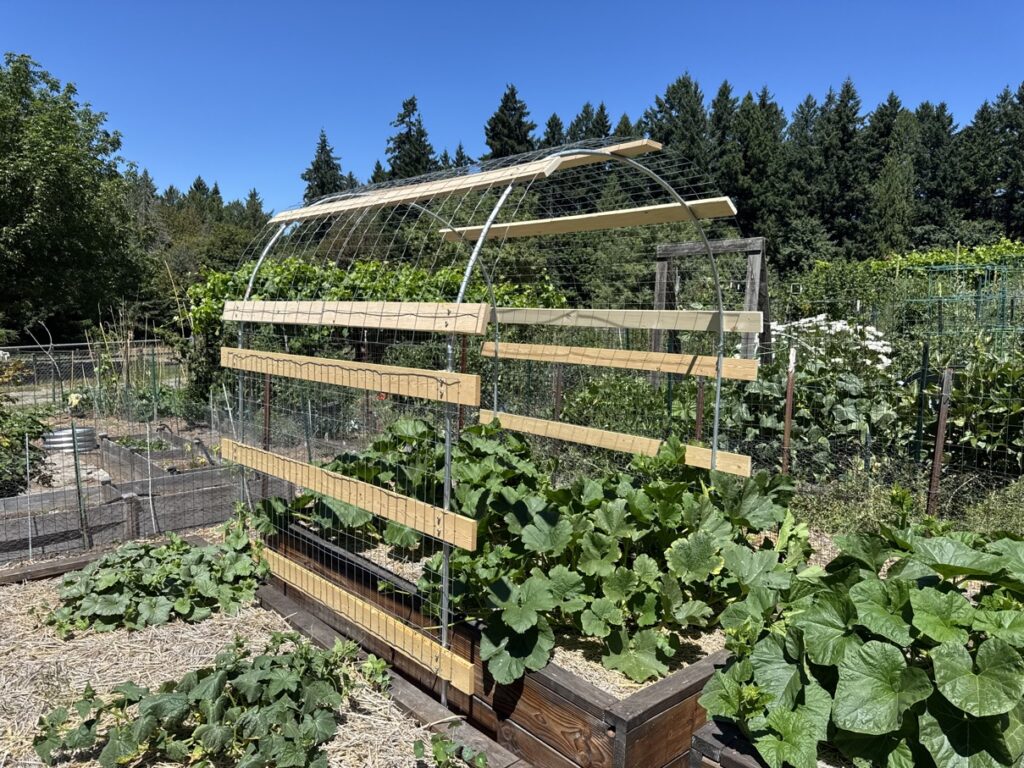

It was a lot of time, sweat and energy but at the end of the day a success(ful installation). Time will tell if it’s actually a success at holding the massive amounts of squash weight that will soon be resting upon it. Ha! That’s a big assumption that yields will be high 👀
Now that we’ve got a history of it all, here’s where everything stands today.
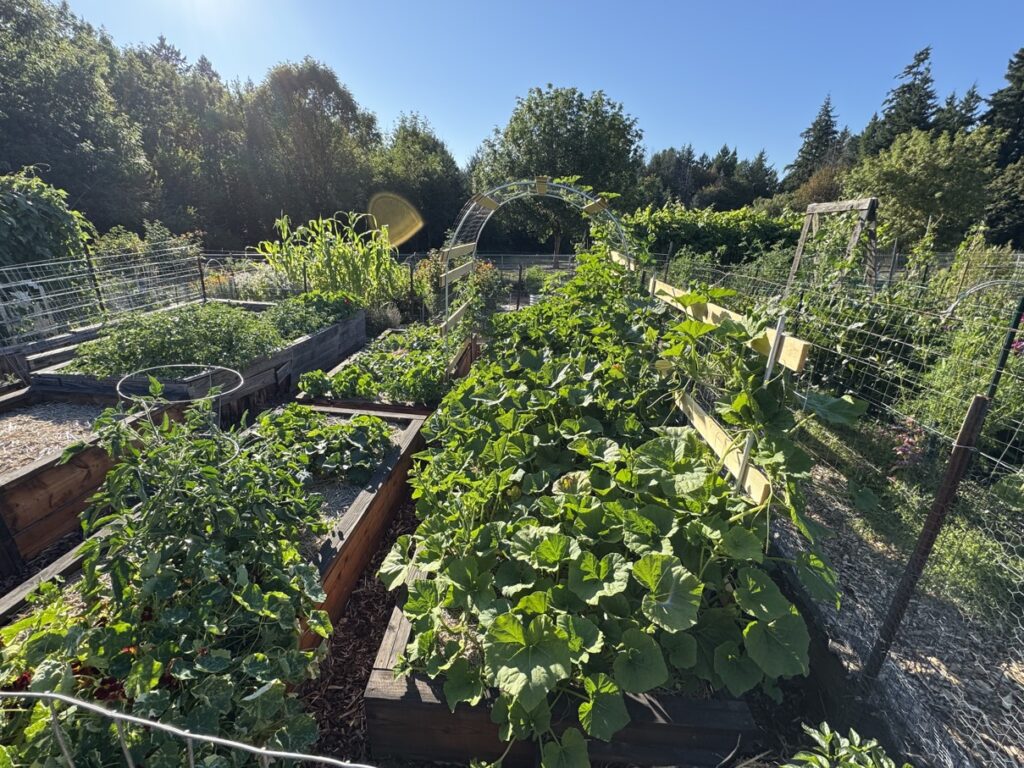
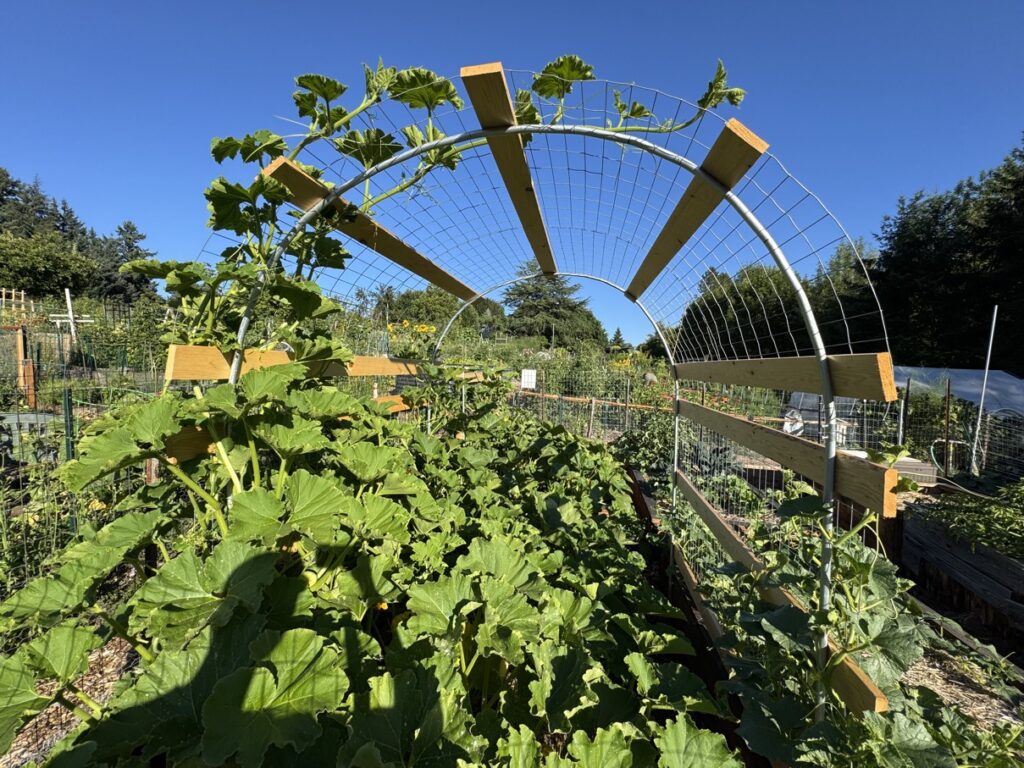
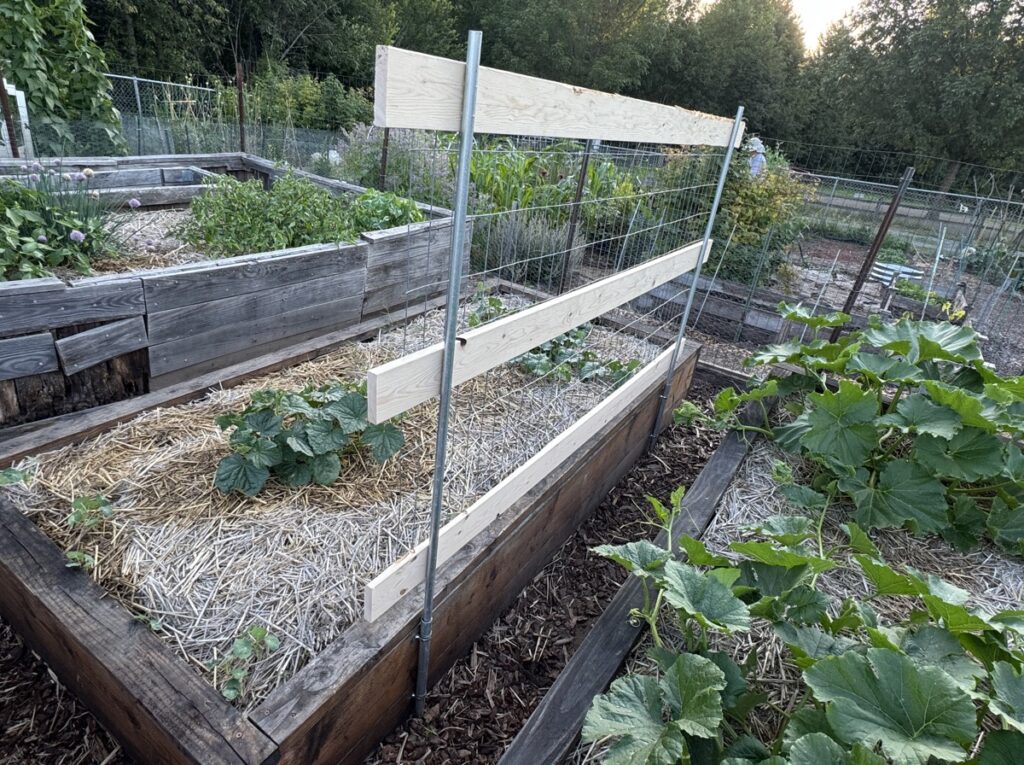
As expected, the squash are going crazy. Perhaps you were keen enough to see yet another wall I built in the foreground of the first picture. My original goal was to build 2 archways for all 4 raised beds so that all the winter squash could grow over them. However due to the amount of work it required (and other priorities) I only got to building one. I didn’t want to fully neglect the other raised bed of winter squash though, so one wall was built and propped up to help wrangle them in somewhat which is better than nothing at all (like last year).
I’m very happy with the trellis design but I can’t yet say I’m satisfied until the true test of whether it holds the weight or not. If it does then we have a real and reusable winner.
Other Supports
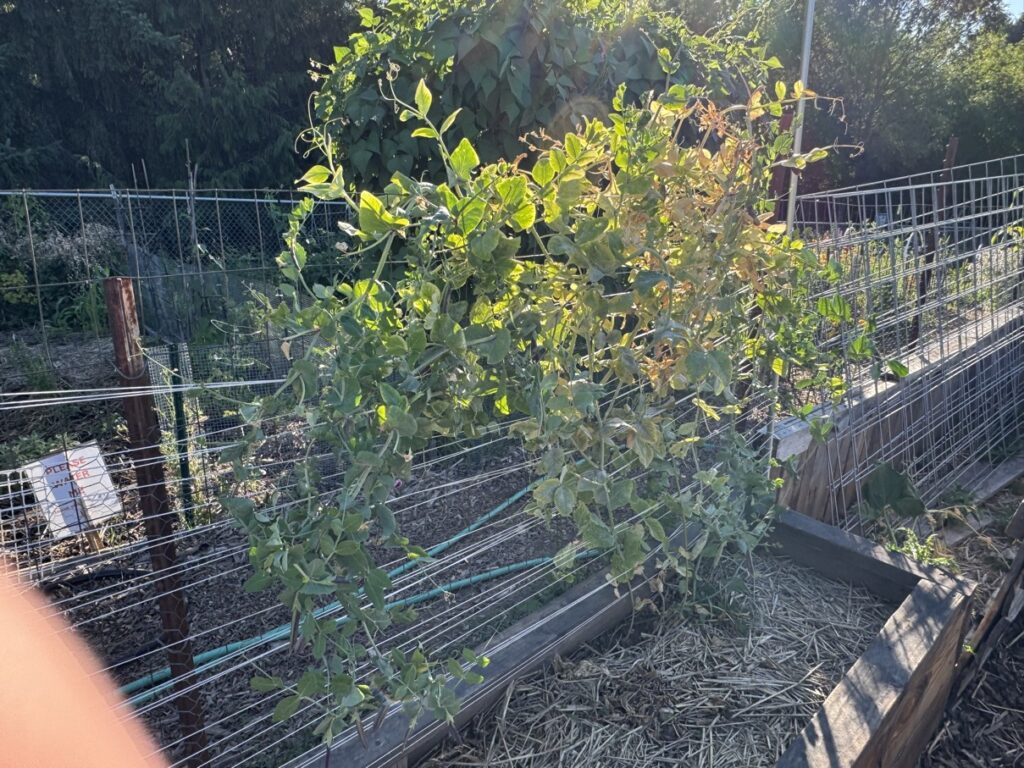
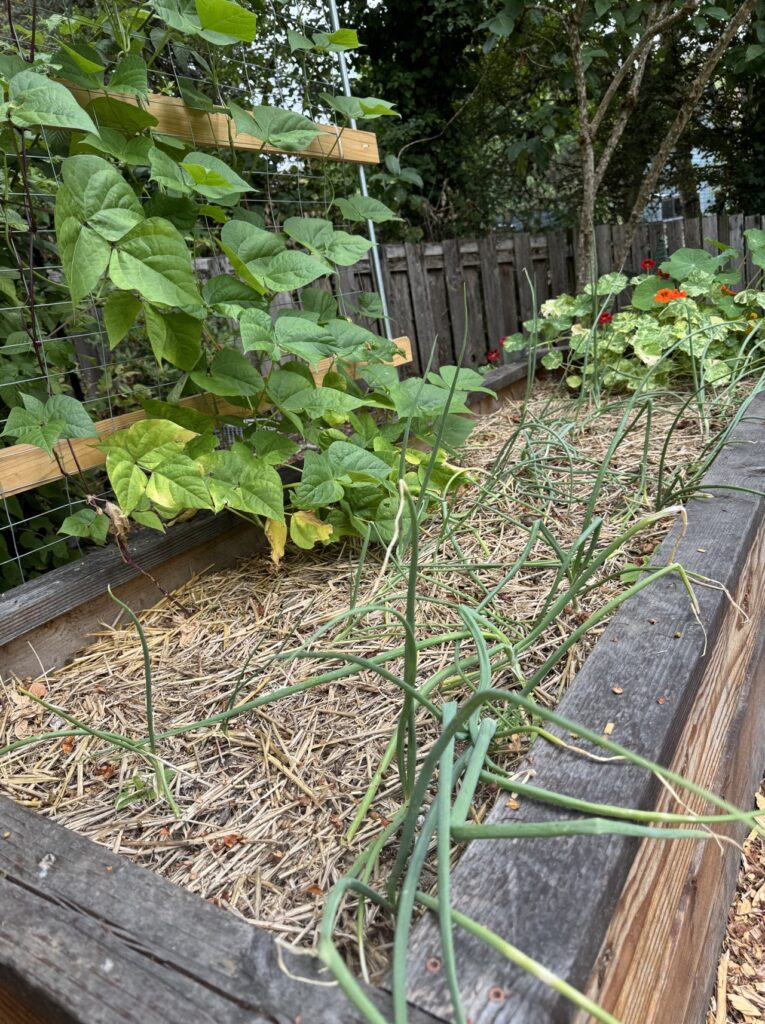
I added the same raised bed sleeve design to other beds, like pictured above for the snap peas (long past season’s end). I’m so far happy with this method allowing for the quick setup and tear down of the conduit pipes to then string line across for various plants that need it.
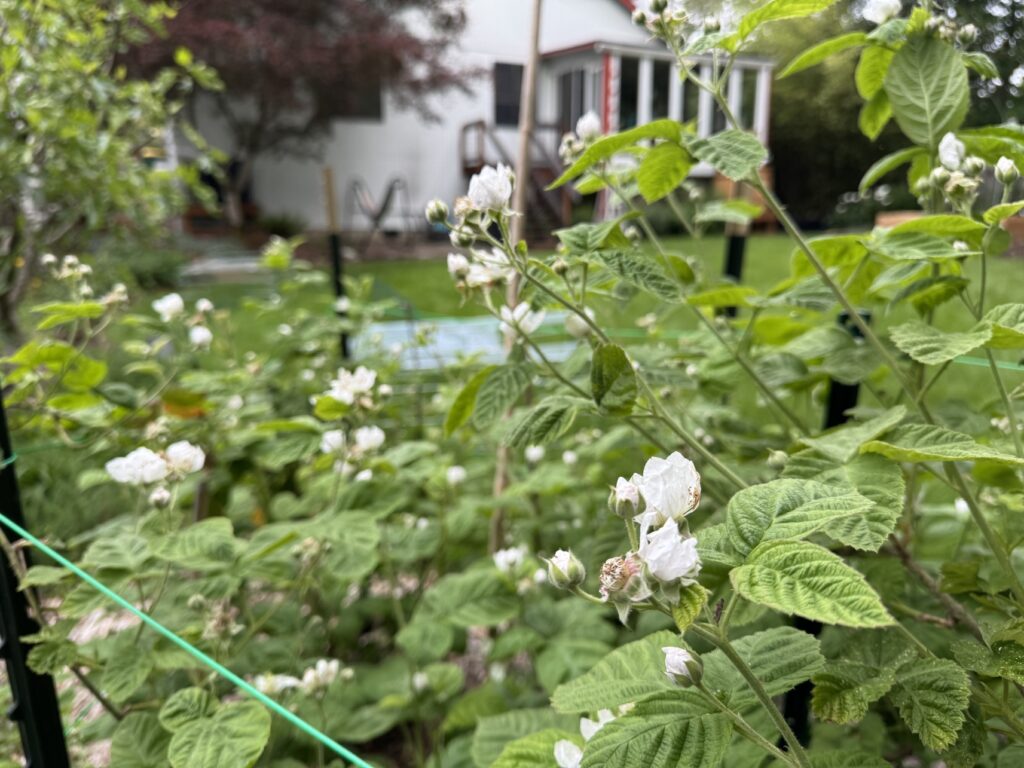
Almost forgot back at home instead of bamboo we used T-Posts and wrapped them with coated wiring to contain all our berries. It turned out to be a massive success over last years design and contained the canes well.
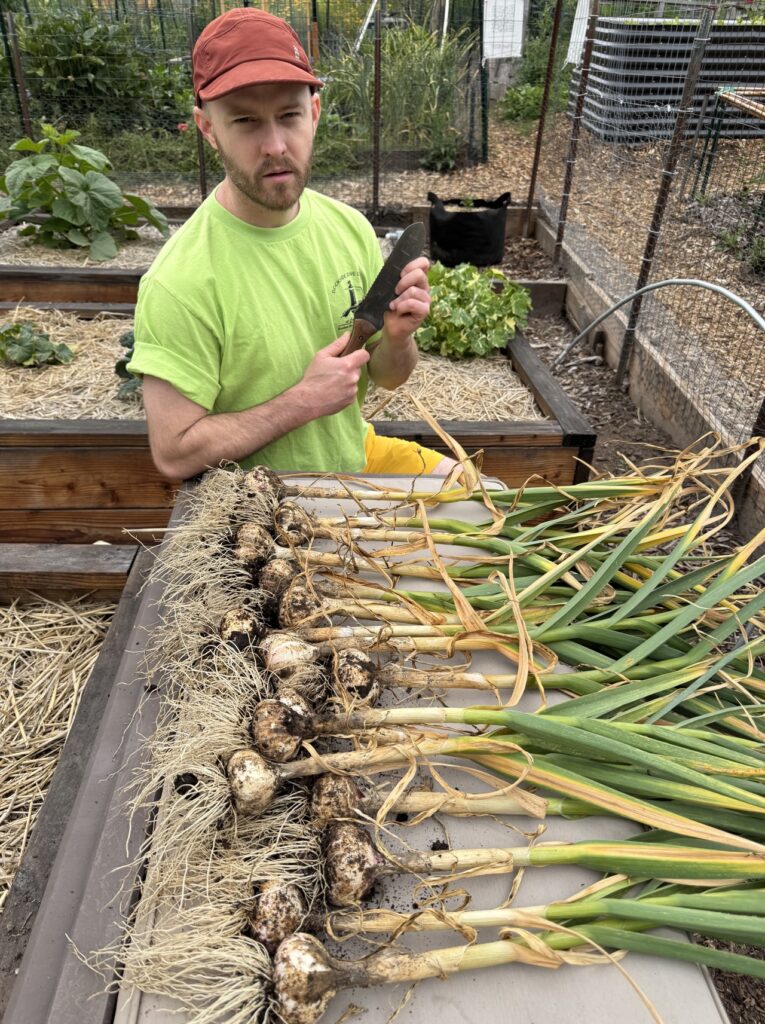
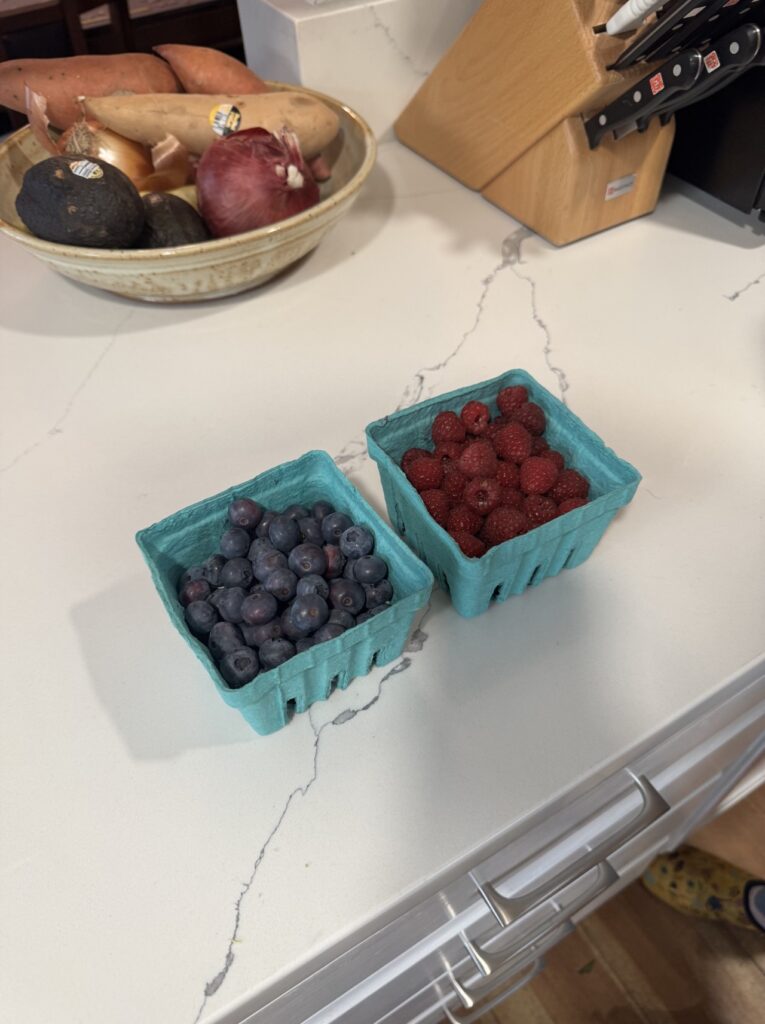
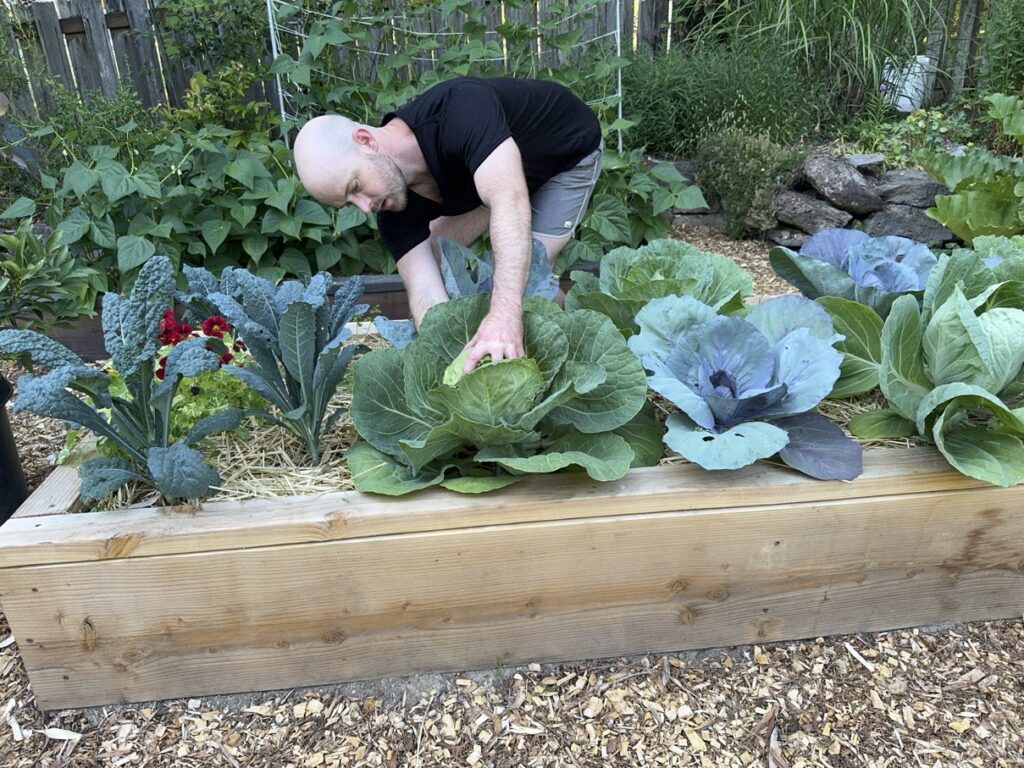
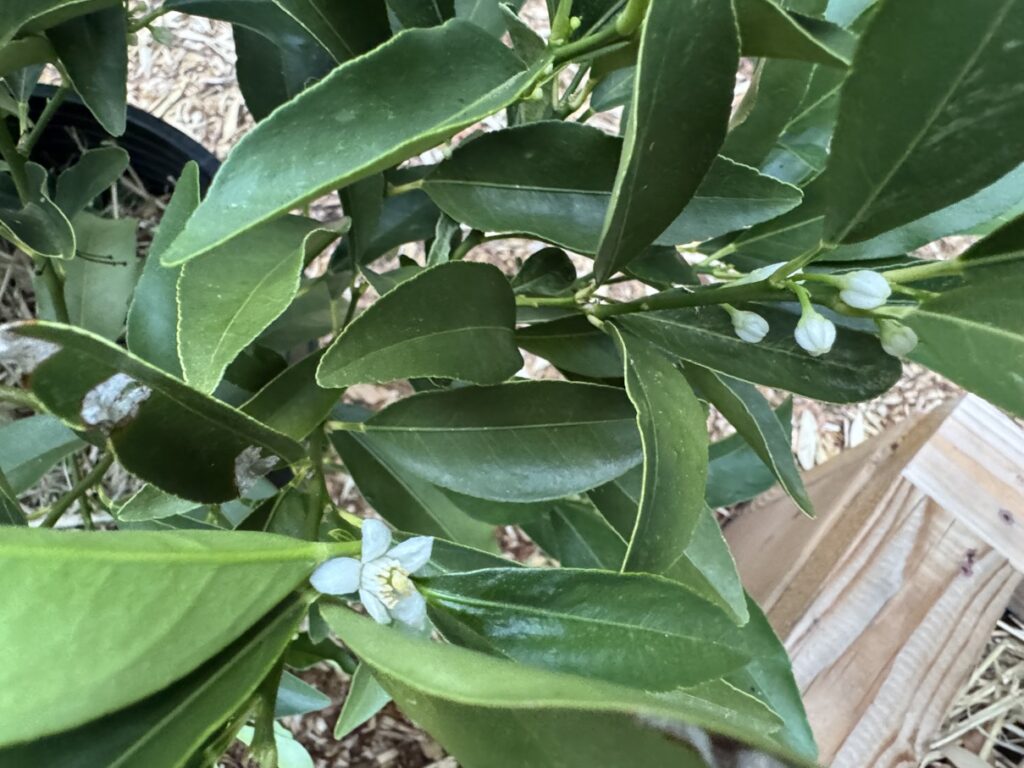
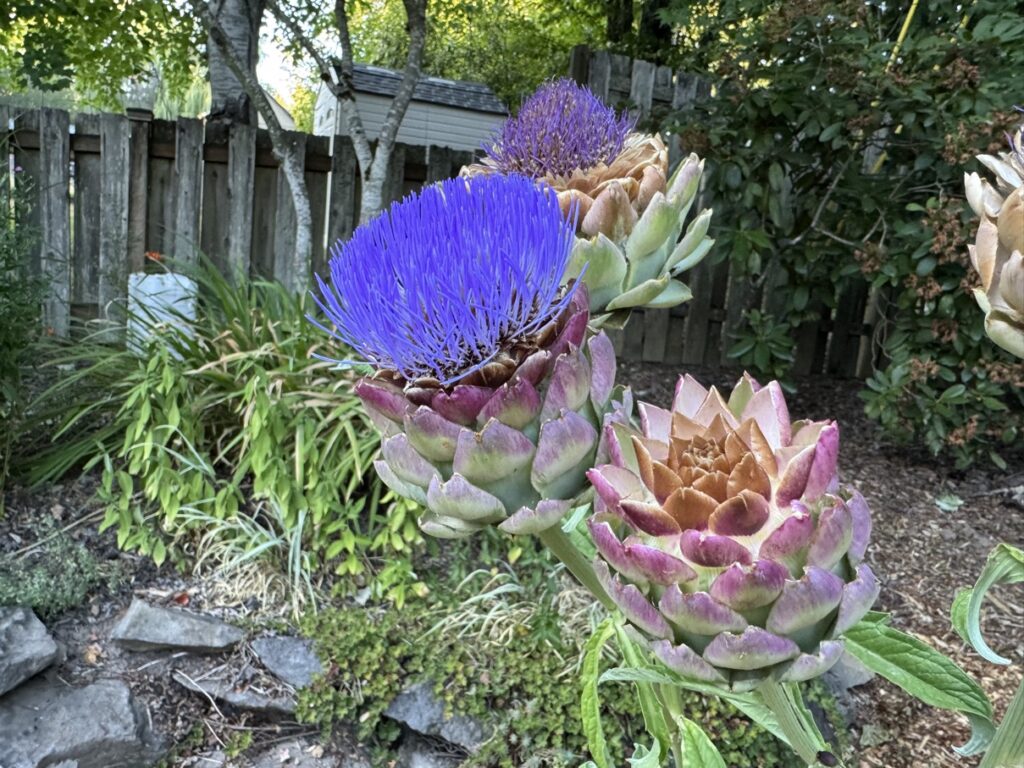
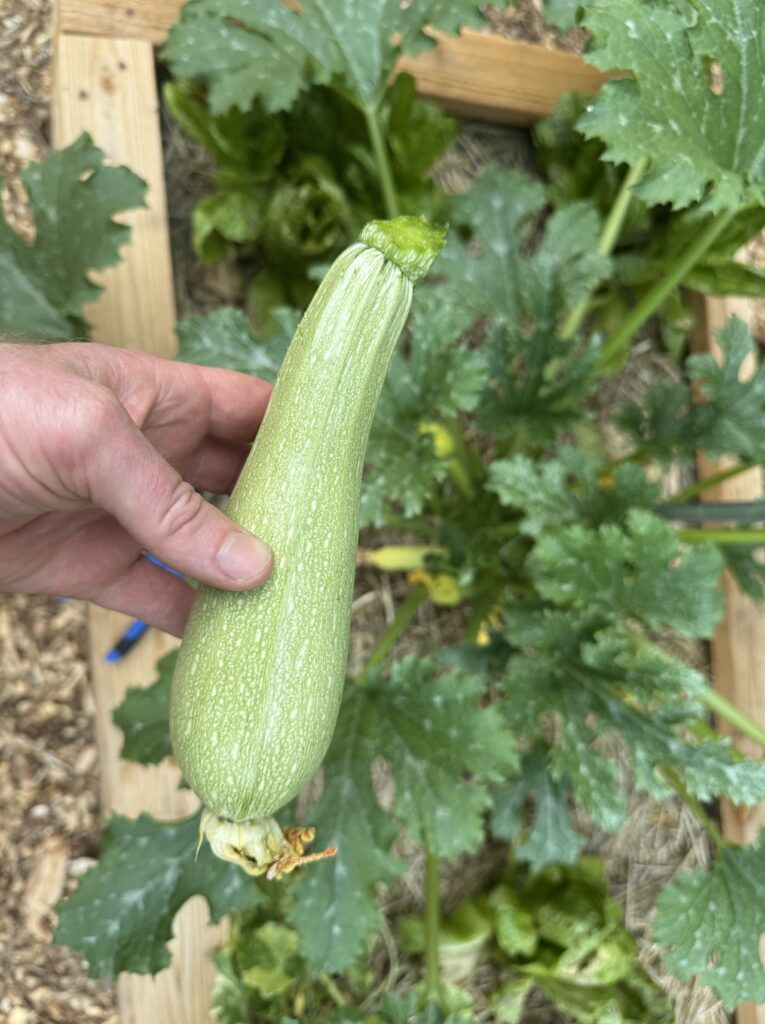
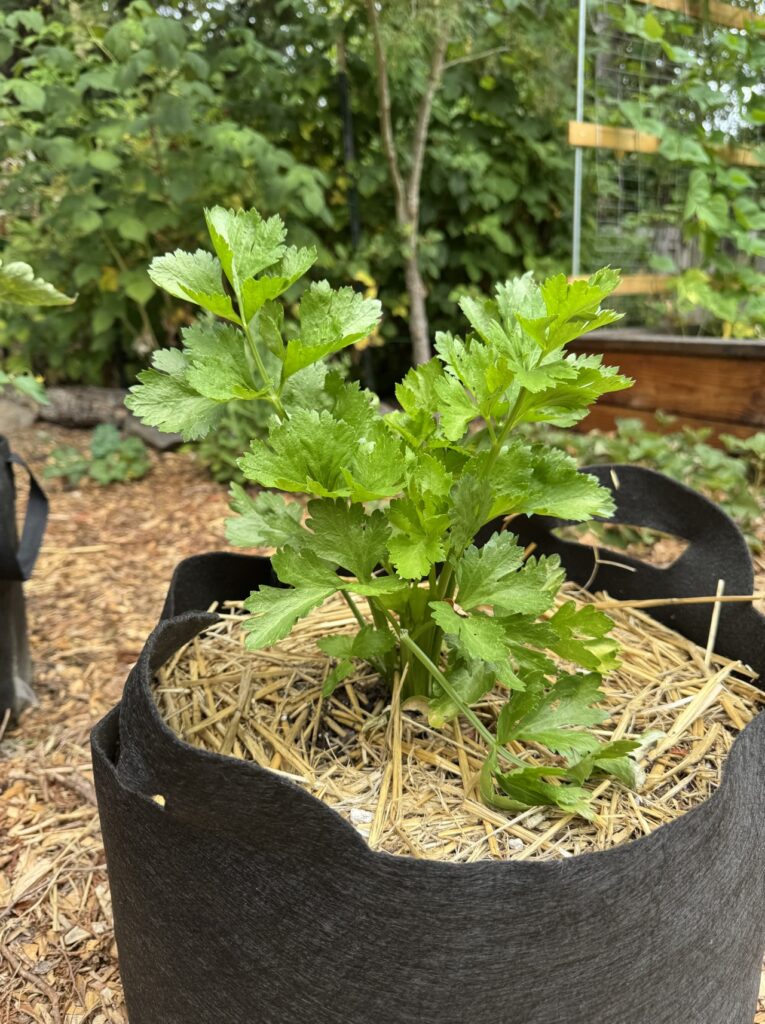
Plant Activity
I can’t just leave you hanging in high summer without some plant activity updates. Since this is long already I’ll keep it brief with some highlights.

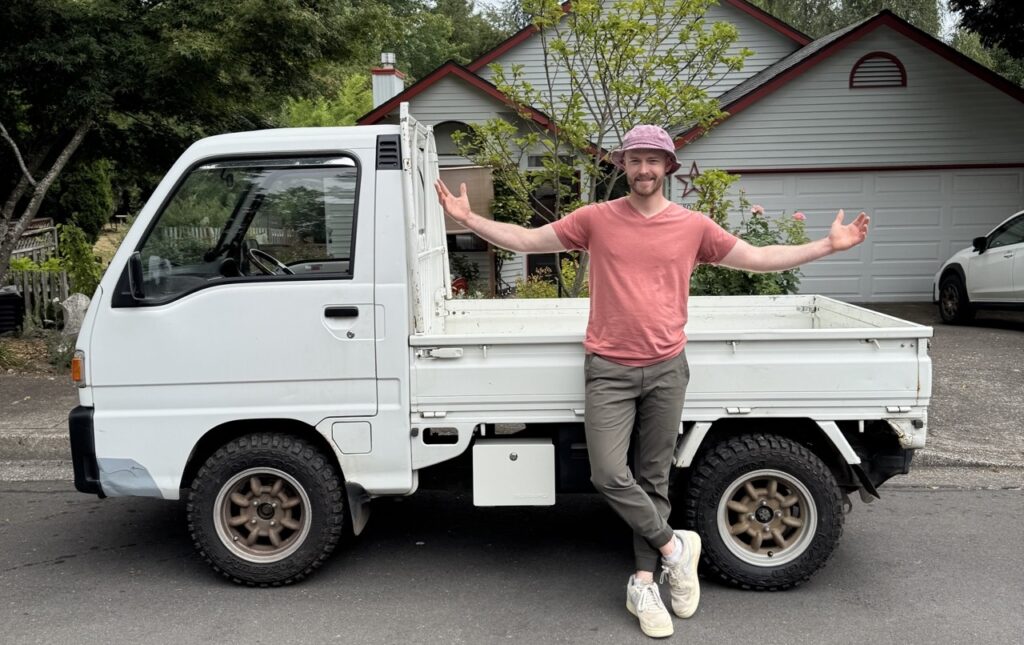
That about covers it for high-season so far. Next post will be a crop-focused post on the successes and failures in the garden thus far. Oh, I almost forgot. Morgan and I have an official garden mobile!
I got tired of doing this all the time:
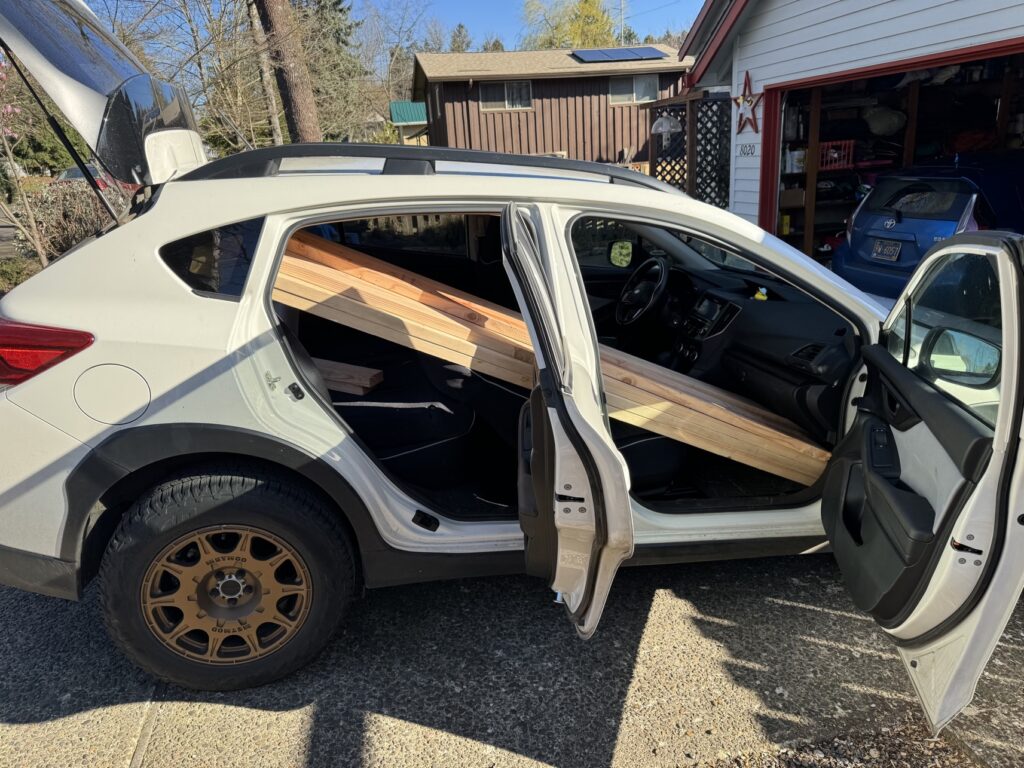

So I bought this! Our new official garden material transporter, also known as a kei truck.
Anyhow, thanks for following along today. Plenty more posts to write and I will continue making it a priority to do so. Cheers and happy gardening!
-AA
Leave a Reply